Customize your workflow.
Create your own templates. Add / remove tasks. Pick your task colors. Choose who gets notified. Your workflow, your way.
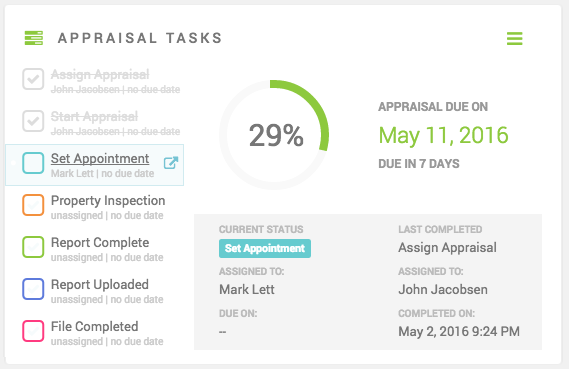
How to create new template tasks
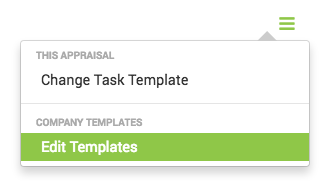
1. Click on your desired appraisal. In the “Appraisal Tasks” section, click on the hamburger icon (3 Horizontal Lines). A dropdown will appear, select “Edit Templates”.
 2. On the left corner, click the “+” Icon to add a new template. A pop-up will prompt you to name your new Template. Click “Add” to confirm.
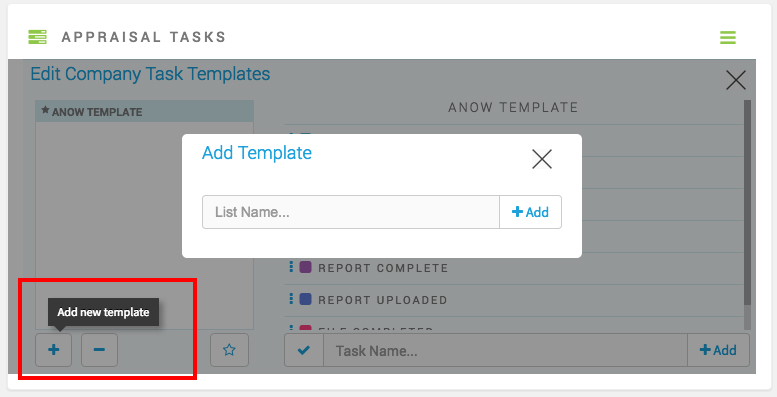
3. Now you can start adding tasks. Start by entering a Task name at the bottom, for instance “Assign Appraiser“. This can be anything according to your workflow. Click “+Add” to add it to the list. Continue adding as many tasks as you like. You can also drag and drop them into the order your prefer, and click on the coloured box to pick your color for each task.

Pick a color for each task
How to change your template
1. Choose the template you wish to use right when you are creating a new appraisal. In the “New Appraisal” page right below File Number, you can select your Appraisal Task Template.
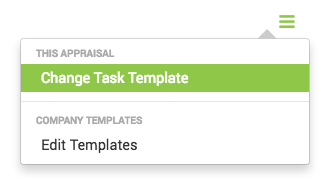
2. Should you want to choose which template you are using after creating the appraisal, simply go to your desired appraisal, then click on the hamburger icon (3 Horizontal Lines). A dropdown will appear, then select “Change Task Template“. Select desired template from the drop-down, then choose Save to ensure the new template is applied.
Updated Dashboard
![]() 1. We’ve added even more filters to your dashboard. You can now hide completed orders, filter orders by status, who’s assigned to it, and so much more.
1. We’ve added even more filters to your dashboard. You can now hide completed orders, filter orders by status, who’s assigned to it, and so much more.
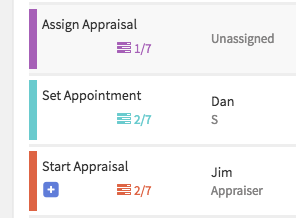
2. Your orders on your dashboard are colour-coded based on your tasks template, and you’ll be able to easily see what step each order is in.
Thanks for reading! If you haven’t taken our tour yet please do!
